
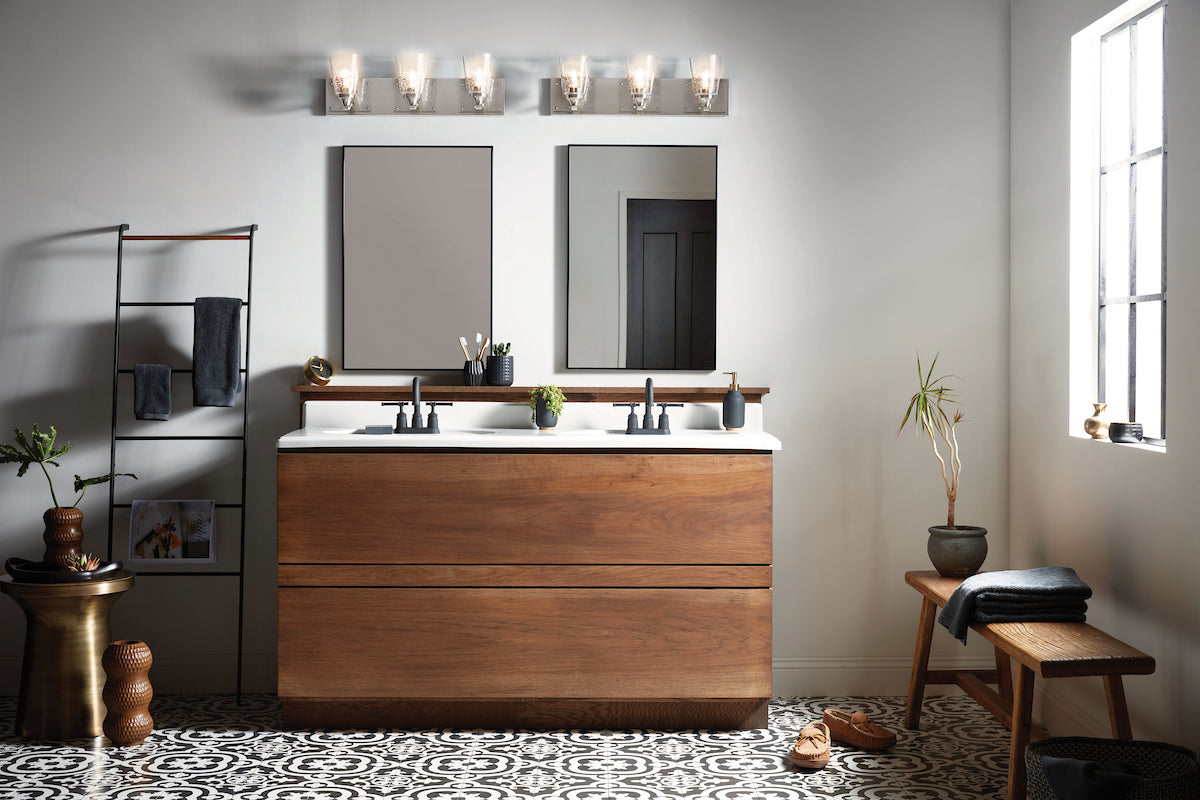
Cohesive bathroom lighting does more than help you see. It shapes how a space feels, how well you can complete daily routines, and how the room reads as a whole. The bathroom is one of the most commonly underlit rooms in the home, often left to a single overhead fixture that casts unflattering shadows and leaves the vanity dim.
Whether you are updating an existing bathroom or planning a full remodel, these bathroom lighting tips will help you layer your light sources, choose the right fixtures, and build a layout that works as hard as the rest of the room.
Key Takeaways
- Layer at least three light sources in every bathroom: ambient overhead, vanity task, and accent or decorative.
- Vanity sconces should flank the mirror at eye level (60–68 inches from the floor) for shadow-free task light.
- Choose warm LED bulbs in the 2700K–3000K range with a CRI of 90 or higher for true, flattering color rendering.
- Always use fixtures rated for the correct moisture zone (damp or wet) to meet code and protect longevity.
- Pair every fixture with a compatible dimmer to shift from task brightness to evening ambiance without changing bulbs.
- Pair bathroom ventilation improvements with lighting upgrades to protect fixtures from moisture damage over time.
Why Bathroom Lighting Matters More Than You Think
Most bathrooms rely on a single ceiling fixture, usually a flush mount or recessed light centered overhead. The problem with this approach is physics: light from directly above creates shadows under the chin, nose, and eyes, making grooming tasks harder and the room feel smaller and harsher than it needs to.
A well-planned bathroom lighting scheme layers multiple sources to cover ambient illumination, task-specific needs at the mirror, and decorative or accent accents that give the room depth and warmth.
How to Layer Light in a Bathroom
Layered lighting is the single most effective improvement you can make to any bathroom. It means combining three distinct types of light so each one handles a different job:
- Ambient lighting provides the overall, room-wide illumination. In most bathrooms, this comes from a ceiling fixture, recessed lights, or a combination of both. It should be bright enough to navigate the space safely but dimmable for evening use.
- Task lighting is concentrated light positioned where you actually work: the vanity mirror. This is where most single-fixture bathrooms fall short. Without dedicated task light at the mirror, the overhead source casts the exact shadows you are trying to see past.
- Accent or decorative lighting adds depth, warmth, and visual interest. In bathrooms this might mean a decorative pendant above a freestanding tub, LED strips under a floating vanity, or a statement sconce on a side wall. It is not strictly functional, but it is what separates a finished space from a merely adequate one.
When all three layers are present and on separate dimmer circuits, a single bathroom can shift from a bright, functional morning environment to a relaxed, spa-like atmosphere in the evening with a few slider adjustments.
Natural and Nighttime Bathroom Lighting Solutions
When planning their bathroom lighting motif, many homeowners overlook the opportunity to incorporate natural light sources into the space.
If you are considering renovating your bathroom or building a new home, incorporating multiple sources of daytime light is an energy-efficient way to illuminate the space and brighten your mood at the same time. Installing a skylight is an easy way for you to let the warmth and brightness of the sun in while maintaining your privacy. If you are lucky enough to have some distance between you and your neighbor, adding a small window also increases the level of natural light in your bathroom and provides a secondary means of ventilation.
But what about illuminating your bathroom once the sun sets? If you have ever been woken up by the bright flash of a bathroom light in the middle of the night when your partner or child goes to the bathroom, you probably understand the value of having a low-level light source for nighttime restroom visits. Not only is the harsh overhead light disruptive to anyone nearby, it is also a rude awakening for the person using the facilities. Homeowners can benefit from having a low-wattage nighttime light source that provides adequate lighting for the task at hand. Installing hall or step lights on the walls or along the toe kick of cabinets will get the job done, or if you have wall cabinets in your bathroom, under cabinet lights can also do the trick.
Vanity Lighting Tips for the Most Flattering Results
The vanity is the most functionally critical lighting zone in any bathroom. Getting it right makes every other task in the room easier.
Flank the Mirror, Do Not Just Top It
The most common vanity lighting mistake is mounting a single fixture above the mirror and stopping there. A top-mounted bar throws light downward, creating shadows under the brow and along the nose. Flanking sconces on either side of the mirror, positioned at roughly eye level, provide even, wrap-around light that is far more flattering and functional.
If your wall layout does not allow for flanking sconces, choose a wide bath bar mounted above the mirror and supplement it with a recessed downlight positioned forward of the mirror line, not directly over it.
Mounting Height for Vanity Sconces
For sconces flanking the mirror, center the fixture at 60 to 68 inches from the finished floor, which aligns with eye level for most adults. If you are mounting a bar above the mirror, position the center of the fixture at 75 to 80 inches from the floor, or 2 to 4 inches above the top of the mirror.
Sizing Vanity Lighting to the Mirror
A common rule: a bath bar should be roughly 75% of the mirror width. For sconces flanking the mirror, each fixture’s height should be proportionate to the mirror height. Avoid fixtures that are too small for the mirror’s scale, as they will read as an afterthought.
How to Choose the Right Bulbs for Bathroom Lighting
The fixture is only half the equation. Bulb selection determines the quality and character of the light itself.
Color Temperature: Kelvin
For bathrooms, the ideal range is 2700K to 3000K. This range produces a warm-to-neutral white light that renders skin tones naturally and feels comfortable for extended grooming sessions. Bulbs above 4000K shift into blue-white territory that can make the space feel clinical and wash out warm materials like wood, tile, and stone.
Color Rendering Index (CRI)
Look for bulbs with a CRI of 90 or higher. CRI measures how accurately a light source renders color compared to natural daylight. A high-CRI bulb in your vanity means makeup, hair color, and skin tones will look in the bathroom the same way they look outside, which is the entire point of functional vanity light.
LED vs. Other Bulb Types
Modern LED bulbs are the right choice for virtually every bathroom application. They run cooler than incandescent, use a fraction of the energy, and have rated lifespans of 25,000 hours or more. Today’s dimmable LED drivers have also closed the performance gap on dimming, which was a known weakness in earlier generations of bathroom LEDs.
Bathroom Lighting Layout: Placement and Spacing Guide
How fixtures are placed matters as much as which fixtures you choose. The following placement guidelines apply to most standard bathroom configurations.
- Recessed ceiling lights: Space 4-inch recessed cans 4 to 5 feet apart in the ceiling for even ambient coverage. For a 5×8-foot bathroom, two fixtures centered in the space is typically sufficient. Avoid placing a recessed can directly over the mirror’s center, as it will backlight your face rather than front-light it.
- Vanity task lights: Mount flanking sconces 28 to 36 inches apart (measured center to center) to frame the mirror. For a double-sink vanity, this typically means a sconce near each outer edge.
- Shower or tub area: Recessed shower lights should be rated wet location (not just damp) if they will be inside the shower enclosure. Position the fixture forward and slightly outside the direct water stream when possible.
- Ceiling height adjustments: In bathrooms with ceilings above 9 feet, scale up fixture size and consider adding a second tier of ambient light or a statement pendant to keep the vertical space from feeling hollow.
What to Know About Bathroom Lighting and Ventilation
Bathroom lighting and ventilation are closely connected. Moisture is the primary enemy of fixture longevity, electrical connections, and bulb performance. A bathroom without adequate ventilation accelerates the degradation of even well-chosen fixtures.
Wet vs. Damp vs. Dry Ratings
Every bathroom fixture carries a moisture rating. Understanding these ratings is essential before purchasing:
- Dry-rated fixtures are only appropriate outside the bathroom entirely or in areas where humidity is negligible.
- Damp-rated fixtures are suitable for protected indoor areas where they may be exposed to humidity but not direct water contact. This covers most bathroom ceiling and vanity fixtures outside the shower zone.
- Wet-rated fixtures are designed for direct water exposure and are required inside shower enclosures and for outdoor installations. Using a damp-rated fixture in a wet location is both a code violation and a safety risk.
Ventilation and Fixture Placement
Running your bathroom exhaust fan during and after showers significantly extends the life of your lighting fixtures and reduces corrosion at wire connections. For new construction or remodels, consider combination fan-and-light units that handle both functions in a single ceiling cut-out, simplifying the installation and ensuring the ventilation source is positioned exactly where moisture concentrates.
If your bathroom has persistent condensation on fixtures, walls, or mirrors even with the fan running, the fan may be undersized for the room volume. The general rule is 1 CFM (cubic feet per minute) of fan capacity per square foot of bathroom floor area.
How to Improve Your Bathroom Lighting Without a Remodel
Not every bathroom lighting improvement requires rewiring or a contractor. Several of the most impactful upgrades can be made without touching existing electrical boxes.
- Swap the bulbs first. If your fixtures use standard sockets, replacing existing bulbs with high-CRI warm LEDs is the lowest-cost, highest-impact change available. A 90+ CRI 2700K LED in an existing vanity bar can transform the quality of light without touching the fixture.
- Add a plug-in sconce. Plug-in wall sconces eliminate the need for hardwiring and can be placed at eye level flanking a mirror when hardwired options are not feasible. They are ideal for renters or for testing a sconce position before committing to a permanent installation.
- Install a dimmer switch. Most standard bathroom switches can be replaced with a compatible dimmer in under an hour. This single upgrade gives you control over both ambiance and energy use without changing any fixtures.
- Add under-vanity LED strip lighting. Low-profile LED tape lights installed along the underside of a floating vanity cabinet add a modern ambient glow that grounds the space and improves the perception of room size at night.
- Replace the vanity bar without rewiring. If your existing vanity bar uses a standard wall-mounted junction box, it can be swapped for a new fixture with no additional electrical work required, as long as the new fixture’s weight and wiring are compatible.
Find Your Bathroom Lighting at Lighting Reimagined
The right bathroom lighting plan is built around layered sources, well-placed fixtures, and bulbs that render light accurately. Whether you are replacing a single vanity bar or rethinking an entire primary bathroom layout, the principles above provide a framework that applies to bathrooms of every size and style.
Browse Lighting Reimagined’s full collection of bathroom and vanity lighting, or use the filters to narrow by fixture type, finish, and size. For personalized recommendations tailored to your specific layout and style, our complimentary Concierge Services connect you with a design professional who can review your floor plan and recommend a complete fixture and placement plan. Contact us today to get started.